Getting Started with Home Improvement for Your 3D Contractors Project
A home improvement project can start with one simple thought: “This room could work better.” Then the questions arrive fast. What should be fixed first? How much should be planned before calling a contractor? What choices will affect the budget? What needs a permit? How do you keep the project from taking over the entire house?
The best projects do not begin with a sledgehammer. They begin with a clear plan, a realistic scope, and the right team. Whether the goal is a refreshed bathroom, a better kitchen layout, a finished basement, new flooring, or a larger renovation, the early decisions shape everything that follows.
This guide walks through the first steps of planning a home improvement project with 3D Contractors in mind, from setting goals to preparing the home before work begins.

Start with the problem you want to solve
Before choosing finishes or browsing fixtures, define what is not working. A beautiful result matters, but a project should also solve a real problem in the home.
Common starting points include:
A kitchen with poor storage or an awkward layout
A bathroom that feels dated, cramped, or hard to clean
Flooring that is worn, uneven, or no longer fits the home
A basement that could become useful living space
Outdoor areas that need repair or better function
Walls, trim, or surfaces that need a cleaner finish
The most useful question is simple: What should be better when the project is done?
For example, “update the bathroom” is a broad idea. “Replace the old tub with a walk-in shower, improve lighting, add storage, and use easier-to-clean materials” is a plan that a contractor can price, schedule, and build around.
Clarity also helps prevent scope creep. That is when a project keeps growing after work begins. Some changes are worth making, especially when hidden issues appear. But many expensive changes happen because the original goal was not clear enough.
Decide what kind of project you are starting
Home improvement projects come in different sizes. Knowing the category helps set expectations for cost, timing, disruption, and planning.
Project type | What it usually involves | Planning level |
Cosmetic update | Paint, fixtures, hardware, minor surface work | Light to moderate |
Repair project | Fixing damaged drywall, flooring, trim, siding, or other areas | Depends on damage |
Room remodel | Updating a kitchen, bathroom, laundry room, or bedroom | Moderate to detailed |
Layout change | Moving walls, changing openings, or reworking room flow | Detailed |
Addition or major renovation | Expanding living space or changing major systems | High |
A small update may only require product selections and scheduling. A larger remodel may need drawings, structural review, permits, inspections, and coordination with plumbers, electricians, or other trades.
This is where a contractor’s early input matters. A project that looks simple from the outside may involve plumbing, electrical, framing, or moisture control once the work begins. Getting a professional opinion early can help separate a quick refresh from a deeper renovation.
Build a realistic scope before setting the budget
Many homeowners begin with a budget number, then try to fit the project inside it. That can work, but only if the scope is clear.
A better first step is to list the work in three groups.
Must have
These are the items that need to happen for the project to be successful. For a bathroom, that might include replacing a leaky shower, repairing subfloor damage, and improving ventilation.
Nice to have
These would improve the finished space but could be adjusted if needed. Examples include heated floors, custom shelving, upgraded tile, or higher-end fixtures.
Future phase
These are good ideas that can wait. Maybe the adjacent hallway flooring or extra built-ins can happen later.
This approach helps 3D Contractors or any project team understand where the priorities are. It also makes budget conversations more useful. Instead of asking, “How much will my remodel cost?” the better question becomes, “What is the best way to complete these priorities within a sensible budget?”

Understand the budget beyond materials
Materials are only one part of the total cost. A project budget can include labor, preparation, demolition, disposal, permits, inspections, repairs, delivery fees, and finishing work.
For example, a flooring project may involve more than buying new flooring. The crew may need to remove old material, fix uneven subfloor areas, undercut door jambs, install transitions, and replace baseboards. A bathroom remodel may reveal water damage after demolition. A kitchen update may require electrical work to meet current safety needs.
A good project plan leaves room for these realities. That does not mean expecting the worst. It means avoiding a budget that is so tight that one normal surprise creates stress.
A practical budget conversation should cover:
What is included in the estimate
What is not included
Which selections affect price the most
How changes are handled
What hidden conditions could change the cost
When payments are due
The goal is not just to get a number. The goal is to understand what the number covers.
Think through timing and daily disruption
A home improvement project affects daily life. Even a well-run project brings noise, dust, deliveries, tools, and temporary changes to how the home functions.
Before work begins, think about how the project area connects to the rest of the house. A kitchen remodel may affect meals, storage, and foot traffic. A bathroom remodel may require a backup bathroom. A flooring project may require furniture moving and limited access to rooms.
Ask these timing questions early:
How long is the project expected to take?
Which days or phases will be the most disruptive?
Will water, power, or access be interrupted?
Where will materials be stored?
What areas need to stay clear?
How will pets and children be kept safe during work?
Weather and product availability can also affect timing. Exterior work may shift because of rain, storms, heat, or cold. Interior projects may wait on cabinets, tile, fixtures, or special-order pieces. The more decisions made before work begins, the easier it is to keep the schedule steady.
Choose a contractor before the details get too far ahead
Some homeowners make every design choice first, then call a contractor. That can lead to frustration if the selections do not fit the space, budget, structure, or schedule.
It usually works better to involve a contractor while the plan is still flexible. A qualified contractor can look at the project through a buildable lens. They can flag concerns, suggest order of work, explain trade needs, and help identify which improvements offer the best practical value.
When talking with 3D Contractors about a project, be ready to share:
Photos of the current space
Basic measurements, if available
The main problems to solve
Your must-have list
Style preferences or inspiration images
Budget expectations
Timing goals
Known issues, such as leaks, cracks, or past repairs
You do not need to have every answer ready. In fact, part of the contractor’s role is to help shape the project into something buildable, safe, and realistic.
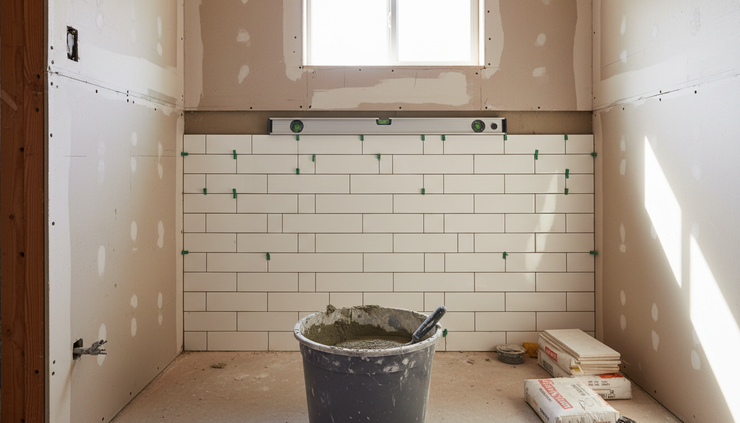
Know which choices matter most
Some choices affect only the look of the finished space. Others affect cost, schedule, durability, and installation.
High-impact choices often include:
Layout
Moving plumbing, walls, doors, windows, or major electrical runs can add time and cost. Keeping the layout can often make a project simpler, though it is not always the best choice.
Materials
Flooring, tile, countertops, cabinets, windows, and fixtures vary widely in price, lead time, and maintenance needs. The right material should match how the space is used, not just how it looks in a showroom.
Moisture control
Bathrooms, kitchens, basements, laundry rooms, and exterior areas need careful attention to water. Proper ventilation, waterproofing, drainage, and sealing help protect the finished work.
Lighting
Lighting changes how a room looks and functions. Kitchens often need task lighting. Bathrooms need clear, even light. Living areas may benefit from layered lighting rather than one overhead fixture.
Finish details
Trim, transitions, grout color, cabinet hardware, paint sheen, and caulk lines may seem small. They often make the difference between a project that feels unfinished and one that feels complete.
Do not skip permits when they are required
Permit requirements vary by location and project type. Many cosmetic updates do not need permits. Work involving structural changes, electrical systems, plumbing systems, major mechanical changes, additions, or certain exterior improvements often does.
Permits can feel like one more step, but they serve a purpose. They help confirm that certain work is reviewed for safety and code compliance. For large projects, permit records can also matter when selling or insuring a home.
A contractor should be able to discuss whether permits may apply and how the process is usually handled in the project area. Because rules differ by city, county, and state, avoid relying on assumptions or advice from a different region.
Prepare the home before work begins
Good preparation keeps the jobsite safer and helps the crew work efficiently. It also protects belongings and reduces stress.
Before the start date, clear the project area as much as possible. Remove personal items, small furniture, wall decor, rugs, toiletries, dishes, or stored belongings. If the crew needs access to electrical panels, water shutoffs, attics, crawl spaces, or driveways, make sure those areas are reachable.
It also helps to create a simple household plan.
Set up a temporary kitchen if the main kitchen is under construction
Choose a backup bathroom if one is being remodeled
Move fragile items away from nearby walls
Plan parking and delivery space
Keep pets away from work zones
Let household members know the work schedule
Protect nearby items from dust when possible
Contractors often use protective coverings, dust control methods, and cleanup routines, but construction is still construction. The better the home is prepared, the smoother the first few days tend to be.
Communicate clearly during the project
Even with a strong plan, questions will come up. Materials may arrive with slight variations. Hidden conditions may appear after demolition. A small design decision may need approval before the next step can continue.
Clear communication keeps those moments from becoming bigger problems.
Agree on the best way to communicate before work begins. Some people prefer phone calls. Others prefer texts or email so decisions are easy to track. For larger projects, written change approvals are especially useful. They help everyone understand what changed, why it changed, and how it affects cost or timing.
A few habits help during the active work phase:
Ask questions early
Review changes before approving them
Keep selections organized
Avoid making separate requests to different crew members
Walk through progress at key stages
Bring up concerns while they can still be fixed easily
Respect goes both ways. Homeowners deserve clear answers and careful work. Crews also need safe access, timely decisions, and room to complete the job properly.
Review the finished work with care
The final walkthrough is the time to look closely. This does not need to feel tense. It should be a normal part of finishing the project well.
Walk through the completed area with the contractor and compare it to the agreed scope. Check doors, drawers, fixtures, outlets, paint lines, tile work, flooring transitions, trim, caulking, and cleanup. If something needs attention, make a clear list.
A good final review may include:
Confirming that agreed work is complete
Reviewing care instructions for new materials
Collecting warranty or product information, if available
Asking about maintenance needs
Discussing any punch list items
Making sure final cleanup expectations are clear
Some materials need regular care. Grout may need cleaning with the right products. Wood floors may need felt pads under furniture. Exterior finishes may need periodic inspection. A few simple habits can protect the investment for years.
Closing Thoughts
In conclusion, the significance of thorough preparation in project management cannot be overstated. The steps taken before the first tool is utilized are pivotal in shaping the trajectory of a project. By prioritizing clear objectives, comprehensive planning, effective team assembly, and robust communication, project managers lay a strong foundation that facilitates smooth execution and minimizes potential setbacks. As projects become increasingly complex, the importance of these preparatory phases will only grow. Investing in the groundwork not only enhances the efficiency of the project but also fosters a collaborative environment where all stakeholders feel valued and engaged. Ultimately, a well-prepared project is one that is more likely to achieve its goals and deliver successful outcomes, leaving a lasting impact on all participants involved.


Comments